
Conceptual Research
To begin this unit, i am going to go through research, which is one the most important stages of design and animation. Gathering images, textures or anything relevant information that allows me to further my knowledge in creating a realistic environment. I believe that the narrative must relate to the environment and must tell a realistic story,this helps the audience form and idea of what is happening or has happened within the scene.
I aim to use Autodesk Maya to create my 3D environment, with a combination if Photoshop, After effects and Nuke to create some interesting matte painting and background designs, blending it together to make a photorealistc scene.
I aim to use Autodesk Maya to create my 3D environment, with a combination if Photoshop, After effects and Nuke to create some interesting matte painting and background designs, blending it together to make a photorealistc scene.
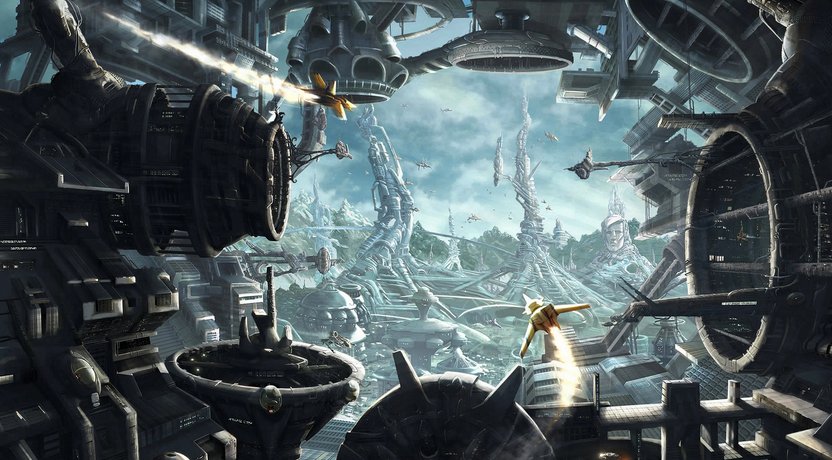
Idea 1: Sci-fi/Interstella environments
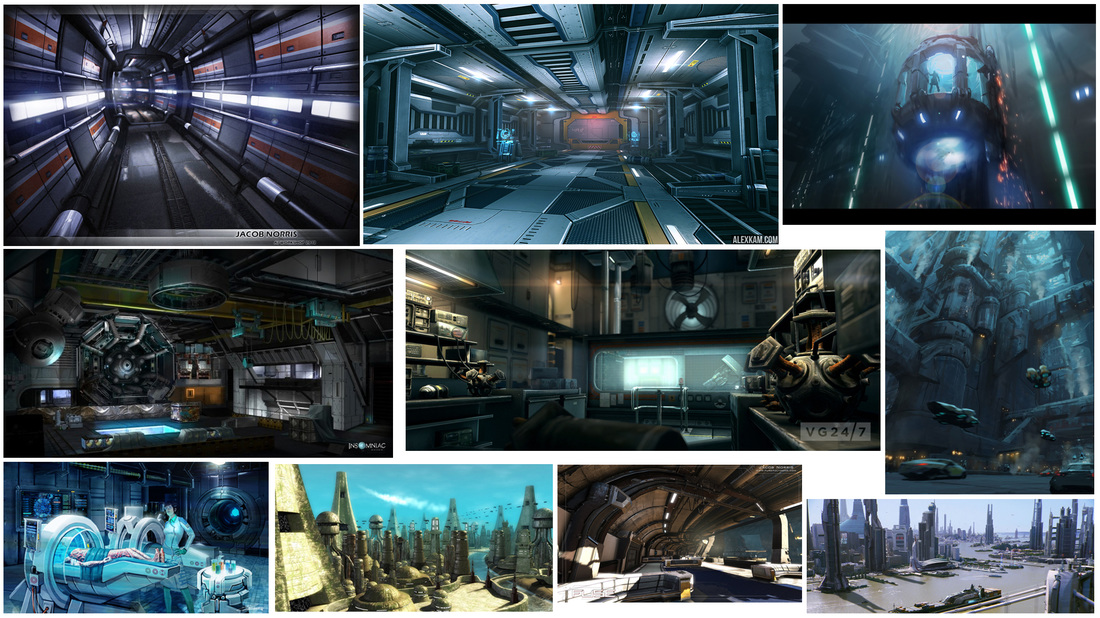
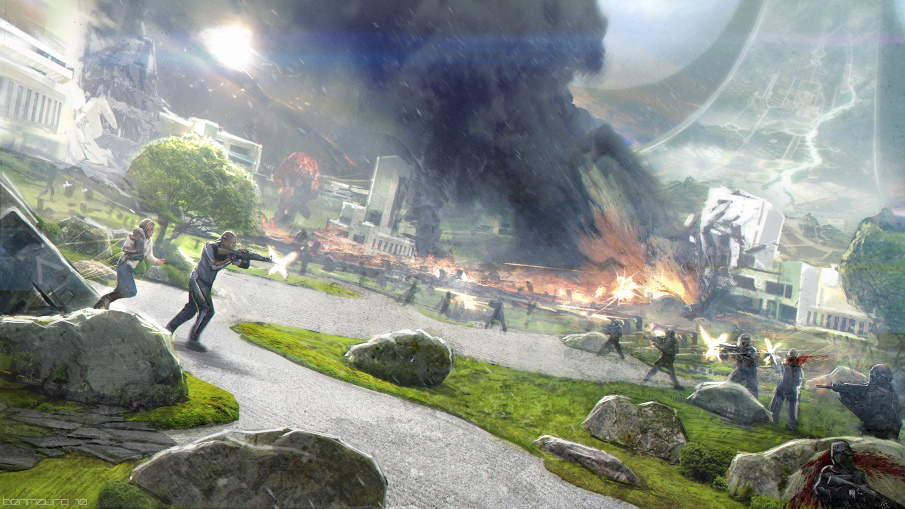
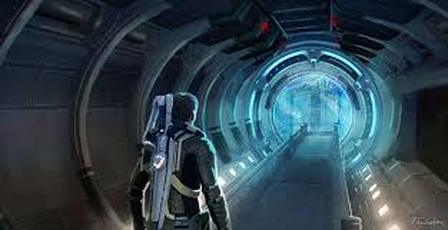
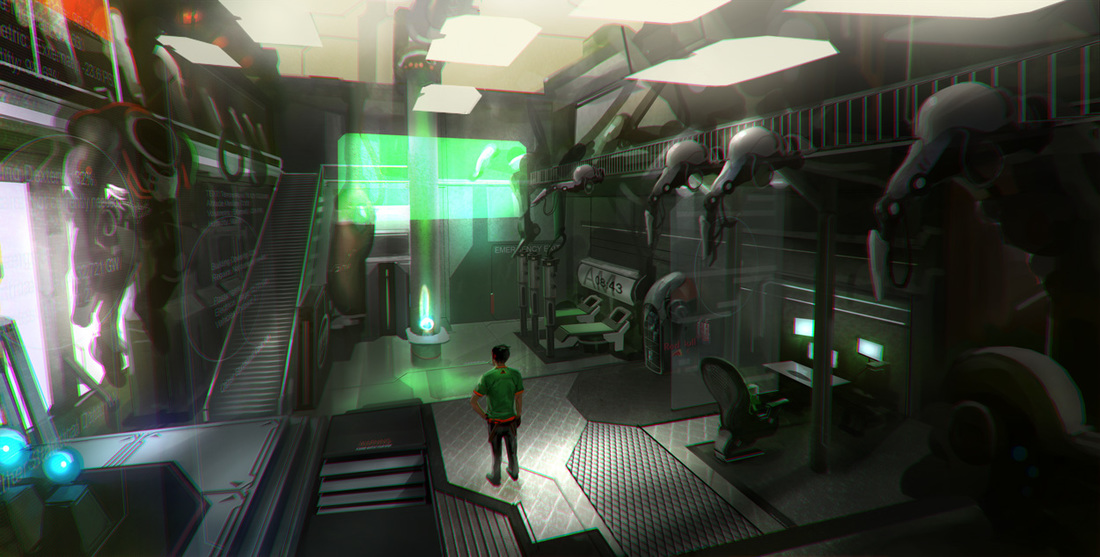
My first idea is one that is commonly seen in blockbuster, Hollywood films, the theme of sci-fi. I have always been interested in the way in which we as designers interpret future architecture, from levitating cars, to seeing through walls. Through doing some research and finding some images that relate to this theme, they all share some similarities in terms of assets and technology, however the architectural designs are all different, the clustering of buildings.
The mood board above shows a range of different designs and concepts for a futuristic environment, each one depicts a different story,this is what i want my environment to be able to do. From looking at the images you can create a narrative, whether it is a laboratory or a scientific space ship, a story can still be told.
Character Profile
Name: Victor Krit
Age: 35
Occupation: Bio medical Archaeologist- He is a scientists that explores anatomy of life forms, from human to terrestrial creatures or aliens.
Location: Victor Krit's Institute of Bio-medical science.
Narrative: We are in the year 3015 and there is an laboratory that has been left by a scientist named Victor Krit, who has currently been called to an emergency, so we are left to explore his place of work. We begin in the corridors of the science firm and begin slowly moving through the scene, looking close and the complexity and the technical designs, the interesting technology with lights moving through the inside of the architecture. We can see the other rooms and we pass them until we eventually reach Victor Krits laboratory, there are a range of different element to explore, touch feel and smell, the main thing that catches your eyes is the medical table, we see a figure covered in sheets, with what seems to be a hand off the sheets. We can see medical tools placed out on the table with fresh fluids and blood of a life form we clearly know is not human.
There are footprints leading from the medical table to outside of the laboratory, something has clear happened for Victor krit to leave in such a rush. The camera slowly moves across the lab so we can see the architecture of the room and the technology within it, looking at the lifeforms within the lab as well as the clues to what may have happened in the laboratory.
ELYSIUM-Reference
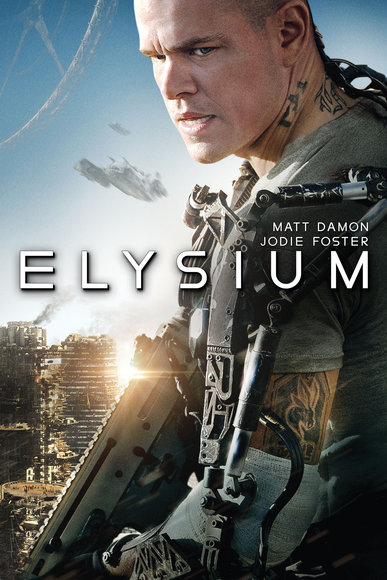
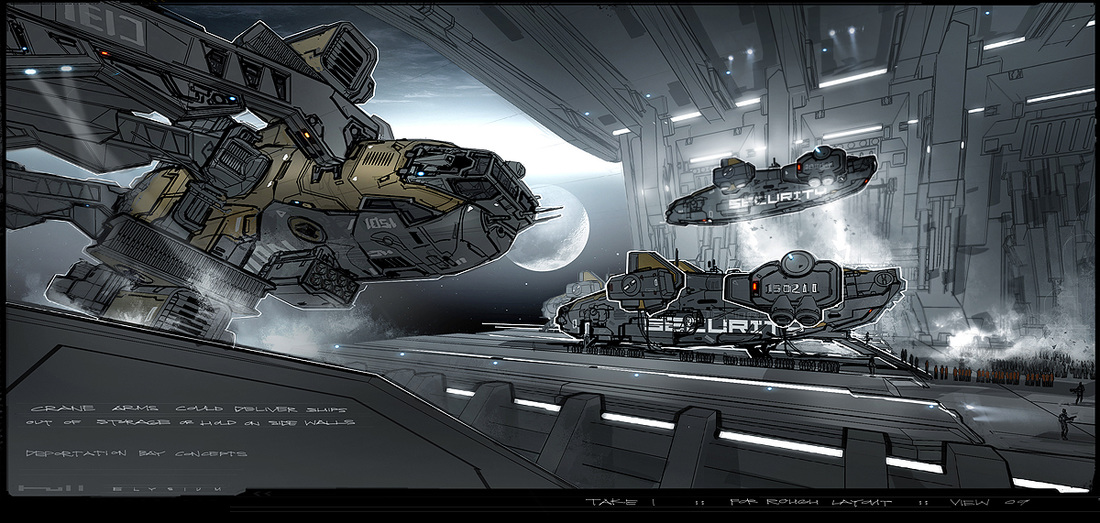
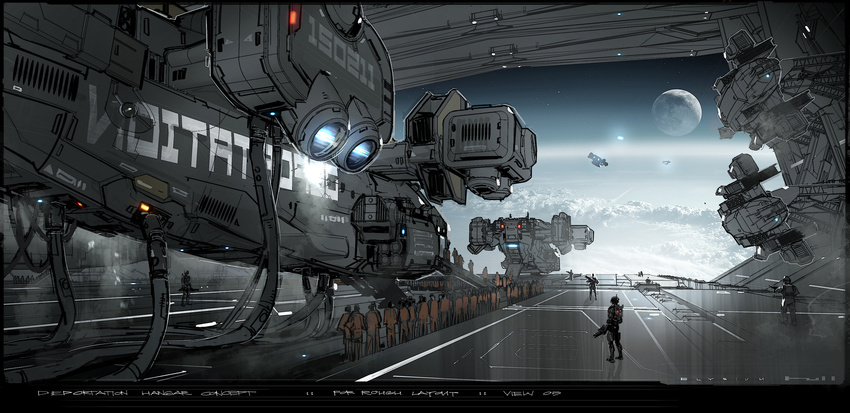
I am interested mainly at the complexity of the designs, i think that is what gives it its futuristic look, the integration on modern designs with more futuristic concepts. this allows us at viewers to understand what the piece of technology is, as we can still relate to the ones we have in our time.
|
Elysium is a film that directly relates to the type of style that i am going to go for in terms of technology and mechanical designs. The whole futuristic and interstellar environment, with levitating cars, body mechanics and sci-fi designs, that is what i am going to aim for this idea, getting the detail and complexity of the environment; ensure a photoelectric feel to the designs.
|
BIO LAB- MAIN ATTRACTION
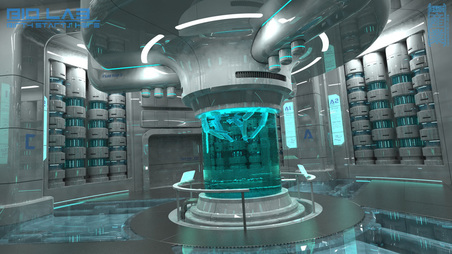
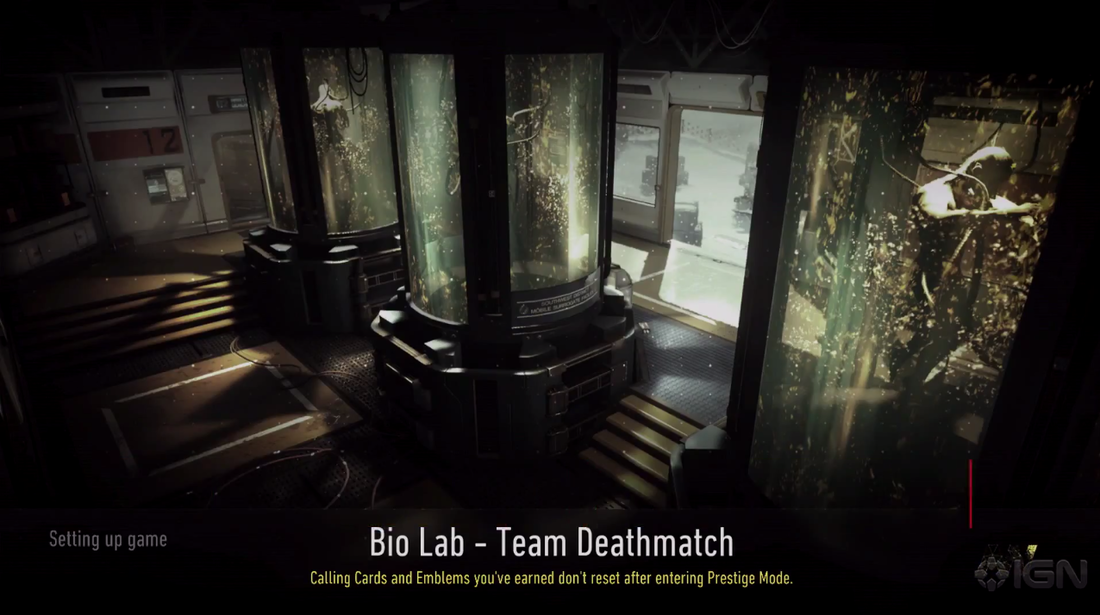
The bio lab where victor works will be the main focus point of this environment, this is where we will explore the different elements within the scene. These are some futuristic concepts for a bio-lab from films and games, these designs have a very mechanical and technical look to it, focusing mainly on the advancement of technology in the future. creating unique designs and improvement to tools that we use in our modern day.
|
|
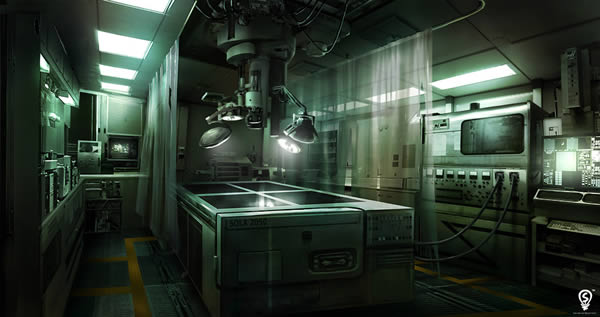
i am interested at the interior elements and how they are placed to gather, elements such as electrics, medical tools, medical beds, scanners, lighting, lasers; all composed into one room. I want my designs to look like a professional laboratory, with futuristic designs within it, showing different tools, structures and lighting that let the viewer know that we are in a different time.
|
|
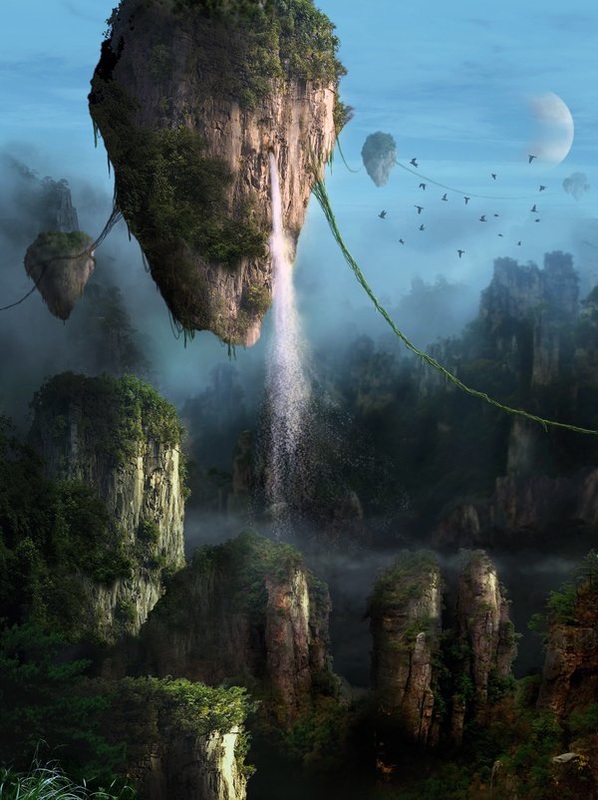
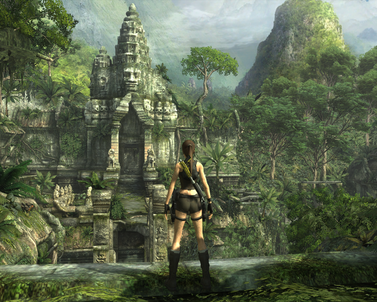
Idea 2: SkyLand Environment
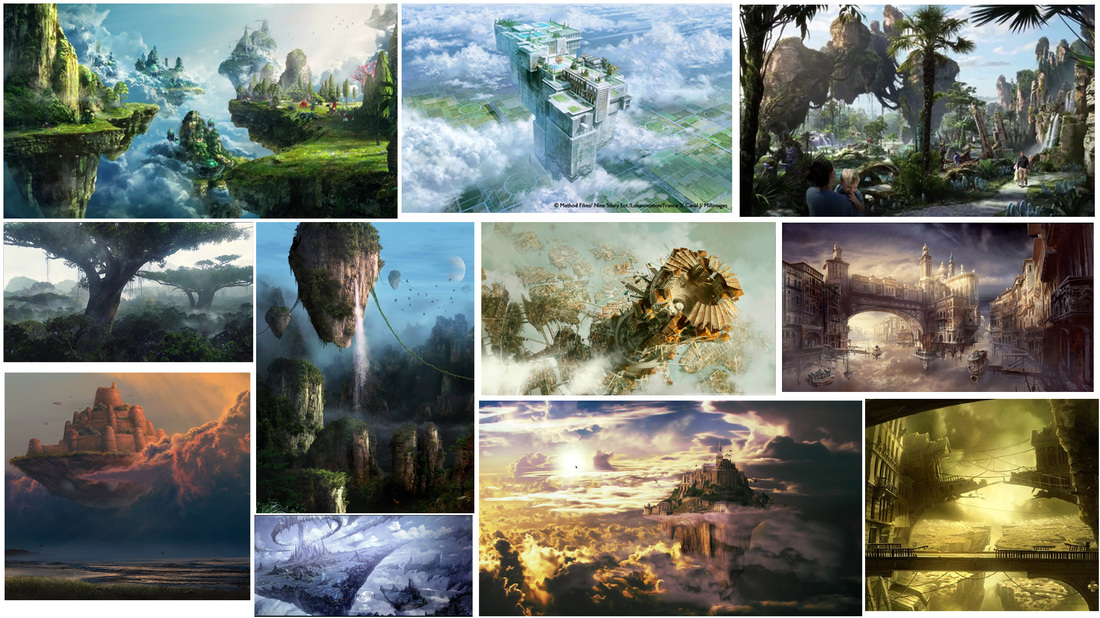
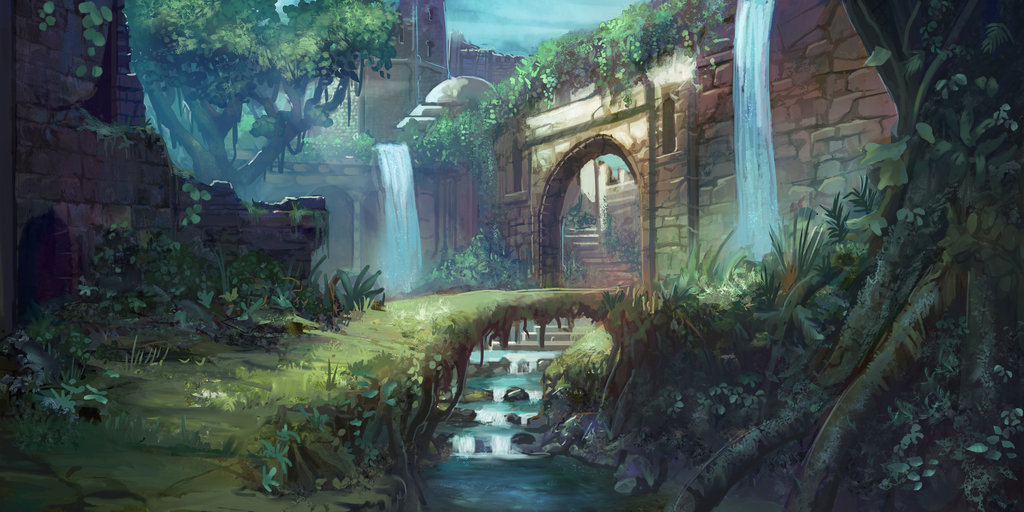
An idea primarily used in alien or inter dimensional planets,the 'Sky land' idea is the idea of a city dale of living things inhabiting floating rocks connected together by bridges of vines and organic ropes. Already this sounds like a captivating story to play around with. I am fascinated at the way in which you can make objects levitate, this idea would let me play around with forces and scripts; to make my sky land move subtly, giving it a realistic look. Creating a narrative for this environment could be very interesting as now i have a choice of either placing humanity or something more extraterrestrial on the environment.
Character Profile: The main focus for this environment is an indigenous alien species, who are primitive in such a biologically advance environment.
Narrative: we begin with as long shot of the scene, showing the full site of the floating mountains and the vast wonders of the sky's and the plantation; this shot establishes that we are no on earth but in a extraterrestrial world. Aztec-like buildings tower over primitive city dale, we then move through the lands and through the different architecture before we get to a particular house. We explore the house starting from the living room all the way through the kitchen, the main aim to the create an idea of who or what is living in the household. The species will not be revealed, however there will be clues in the paintings and photographs of what type of creature inhabits this world.
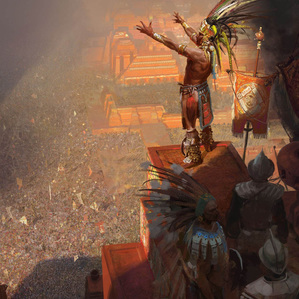
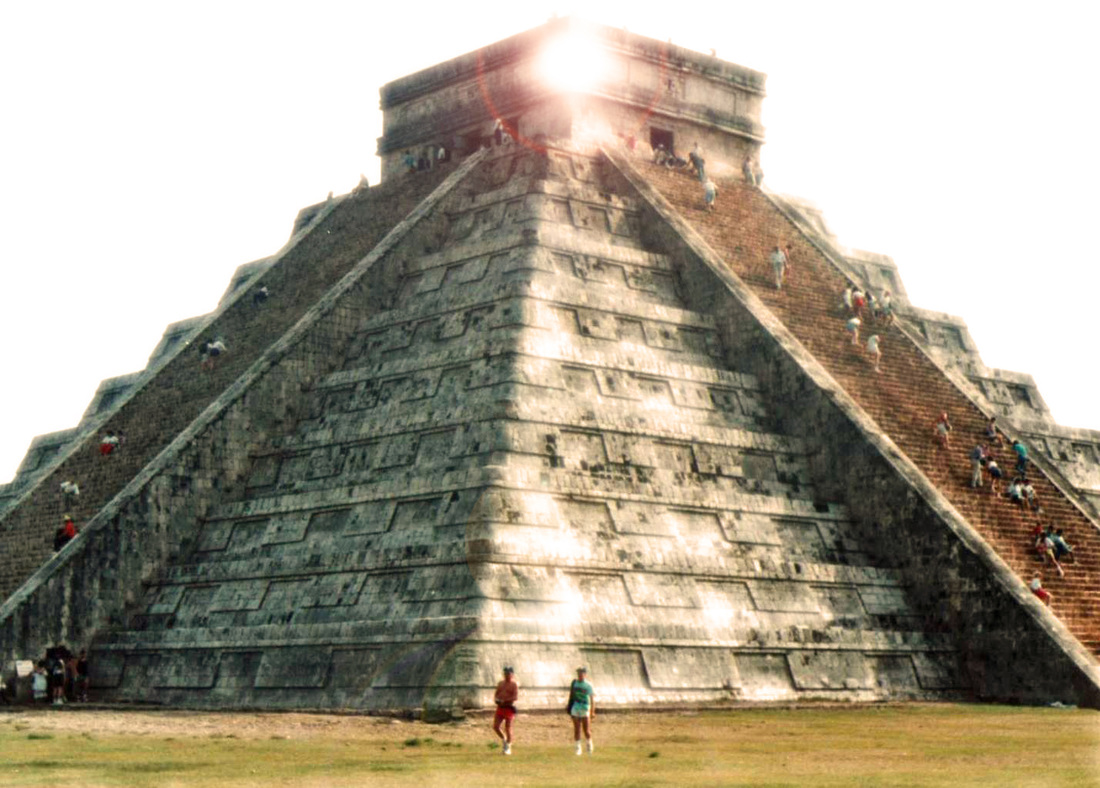
Aztec History

|
The Aztec Empire flourished between c. 1345 and 1521 CE and, at its greatest extent, covered most of northern Mesoamerica.Aztec warriors were able to dominate their neighbouring states and permit rulers such as Motecuhzoma II to impose Aztec ideals and religion across Mexico. Highly accomplished in agricultureand trade, the last of the great Mesoamerican civilizations was also noted for its art and architecture which ranks amongst the finest ever produced on the continent.(http://www.ancient.eu/Aztec_Civilization/)
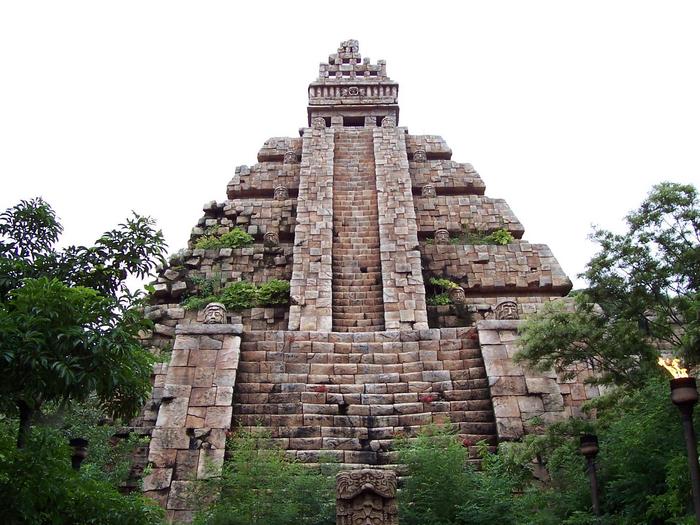
The Aztec culture would be the ideal time frame that best relates to this concept, their temple structures is what i want to base my designs on. Similar to the Egyptians, they share similarities in the pyramid like buildings. The idea that Pyramids represents a form of hierarchy and status could be the meaning as to why they were built as an overpowering structure, used for sacrifices and sacred rituals for their Gods. Re-creating this structure in Maya should not be too complicated, using primitive shapes,such as pyramids and then using the set tools to carve and shape it into the desired design. |
|
|
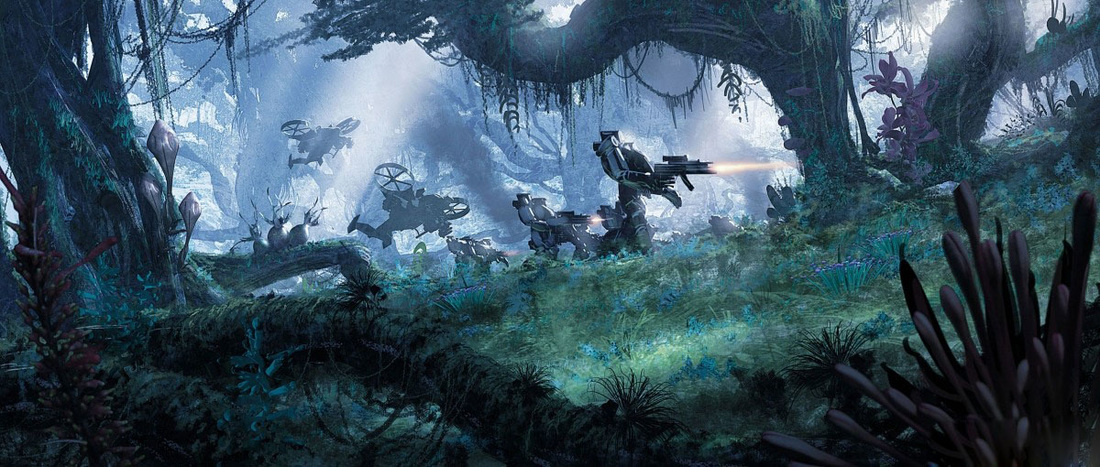
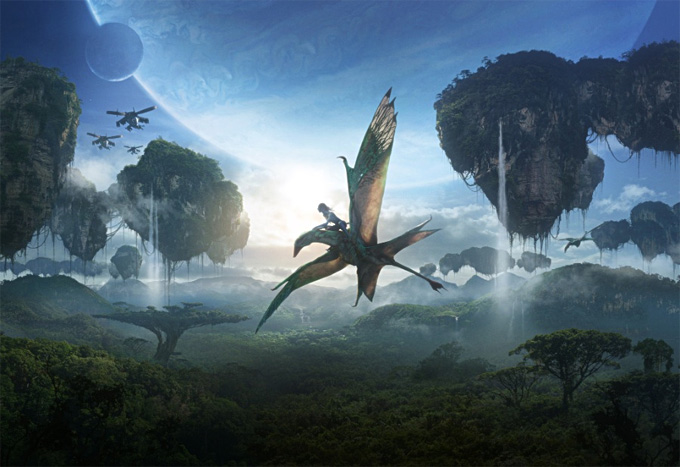
Avatar- floating rocks concepts
Incorporating creatures into the environment could also be effective in establishing a new world and a new planet, theses creatures could be used as a form of transport,similar to horses. The creatures shown in the images would have been CG modeled textured and rigged. Within these concepts, there would have been quiet a few matte painted elements, especially in the background, doing this save time, in terms of rendering elements and animating.
|
Movie reference to this narrative would be 'Avatar', no no the Air bender, the Sci-fi film. The main inspiration would be the floating islands on the planet, the way the organic and natural plantation fills the rocks and they way the rocks are connected together by vines. This could represents and idea of communication, that the indigenous species of the planets have a form of primitive transports via these vines or communicating with them.
|
IDEA 3- MODERN EARTH
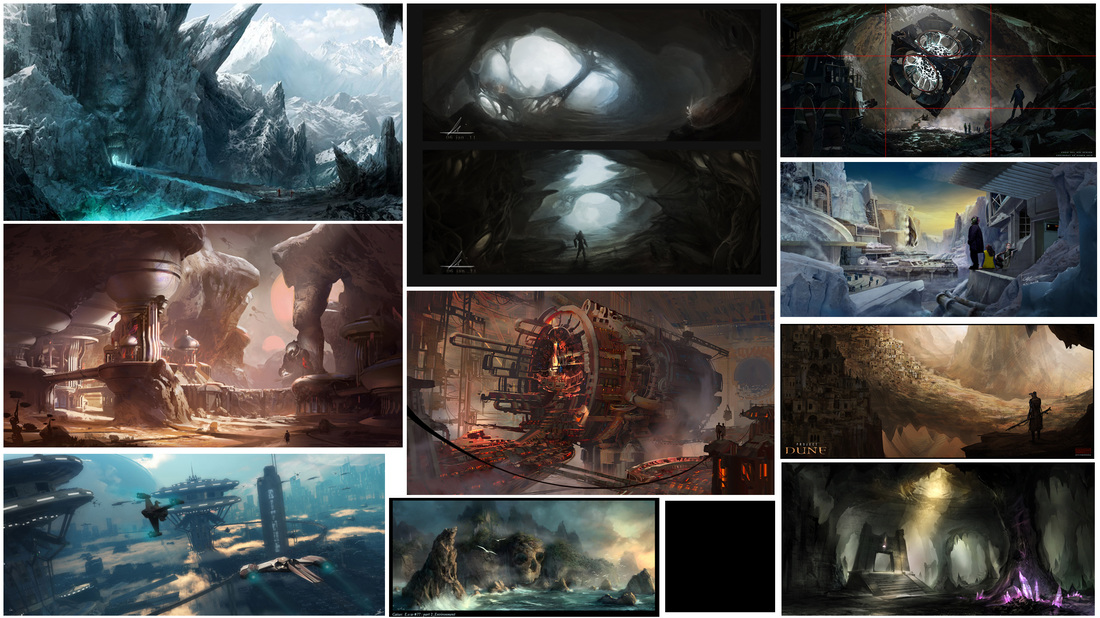
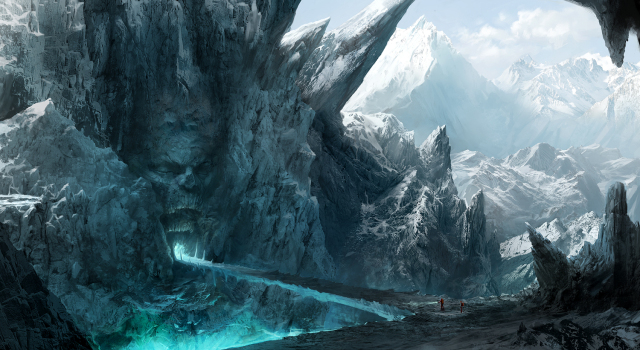
This concept is based on the idea of evolution and the way in which humans may have evolved in some way shape or form and have gone back into the ground, due to the change in atmosphere on the surface. This concept is very broad as in involves creating an underground world that has been infused with the rocks and has become part of the structure. These images are just some of my inspirations on how i see the designs unfolding. There is no focused narrative in this concept, the main aim is to take you through a uniquely designed environment, with a civilisation of what appears to be evolved human beings.
This concept has a mixture between a primitive environment and a sci-fi landscape, from the images below, you can see the blend between the metallic structures in built into the rocky surface, these are some of the idea i may use when taking on this concept. The background would be be most likely be matte painted, either with real photo images or concept designed images on Photoshop. Lighting will also be another obstacle that i would have to tackle, being that this is an underground environment, the lighting has to both reveal the scene and be realistic to the setting.
This concept has a mixture between a primitive environment and a sci-fi landscape, from the images below, you can see the blend between the metallic structures in built into the rocky surface, these are some of the idea i may use when taking on this concept. The background would be be most likely be matte painted, either with real photo images or concept designed images on Photoshop. Lighting will also be another obstacle that i would have to tackle, being that this is an underground environment, the lighting has to both reveal the scene and be realistic to the setting.
Hobbit

|
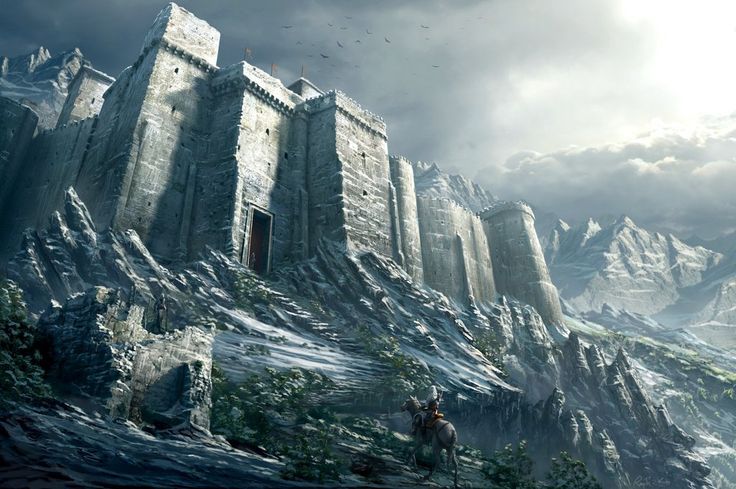
The Hobbit: The Desolation of Smaug is a 2013 epic fantasy adventure film directed by Peter Jackson. It was produced by Wing Nut films in collaboration with New Line Cinema. The film follows the titular character Biblo Baggins as he accompanies Thorin Oakenshield and his fellow Dwarves on a quest to reclaim the Lonely Mountain from the dragon smaug. (http://en.wikipedia.org/wiki/The_Hobbit:_The_Desolation_of_Smaug)
The Hobbit film 'Desolation of Smaug' has the type of structure and designs i feel inspired to re-create, the in-built city-dales into the organic structures. These designs create the idea the a primitive civilization inhabits this environment. This film is set in an era of Magic, Dragons and warlocks, this is a mixture between medieval times and a fantasy concept. The incorporation of a more sci-fi and futuristic design will be used to create the building and the architecture, this will give the idea that we are in a further future no the past. Through using satellite maps, Maya will be able to create realistic terrains, from this the mountains and the Building can be in built into the structure. |
Monday- Visit
Dennis Server's House
We went on a visit to Dennis Server's House, was a special designed house which changed time periods as you move up the levels in the house, from the Victorian era to the World war 1. It also transition from poverty to wealth, allowing you to see the clear contract how the environment changed and the key details that allowed this change. Looking at textures, interior based decorations and lighting; there were also subtle sounds being played as you moved through the different rooms, allowing you to feel as if you were actually in that time period.
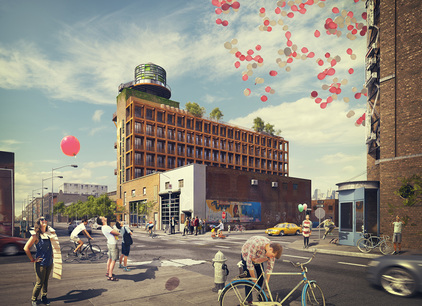
For more inspiration on how to construct a digital environment, we went on a trip down to Shoreditch, walking around the scenery and viewing different buildings and structures. We focused on key elements, such as how shadows reflect the distance of an object to the ground and how lighting bounces of different materials. Glass was one the the main object i focused on as well as plastic, these were the challenges i think I would face within my scene. You can see some of the textures i took a photo of and the buildings as well, these may be used within my scene, but if not i can analyse them and see how lighting reacts with the surface; giving a photo real look to my scene.
These sorts of textures and settings works best with Idea 3, using the ground texture to create realistic bump maps for ground planes in my scenes. The images of the windows and architecture allows be to gain a sense of proportions, especially when matte painting in background, both scale and perspective are important in the task.
We went on a visit to Dennis Server's House, was a special designed house which changed time periods as you move up the levels in the house, from the Victorian era to the World war 1. It also transition from poverty to wealth, allowing you to see the clear contract how the environment changed and the key details that allowed this change. Looking at textures, interior based decorations and lighting; there were also subtle sounds being played as you moved through the different rooms, allowing you to feel as if you were actually in that time period.
For more inspiration on how to construct a digital environment, we went on a trip down to Shoreditch, walking around the scenery and viewing different buildings and structures. We focused on key elements, such as how shadows reflect the distance of an object to the ground and how lighting bounces of different materials. Glass was one the the main object i focused on as well as plastic, these were the challenges i think I would face within my scene. You can see some of the textures i took a photo of and the buildings as well, these may be used within my scene, but if not i can analyse them and see how lighting reacts with the surface; giving a photo real look to my scene.
These sorts of textures and settings works best with Idea 3, using the ground texture to create realistic bump maps for ground planes in my scenes. The images of the windows and architecture allows be to gain a sense of proportions, especially when matte painting in background, both scale and perspective are important in the task.
Industry Research
|
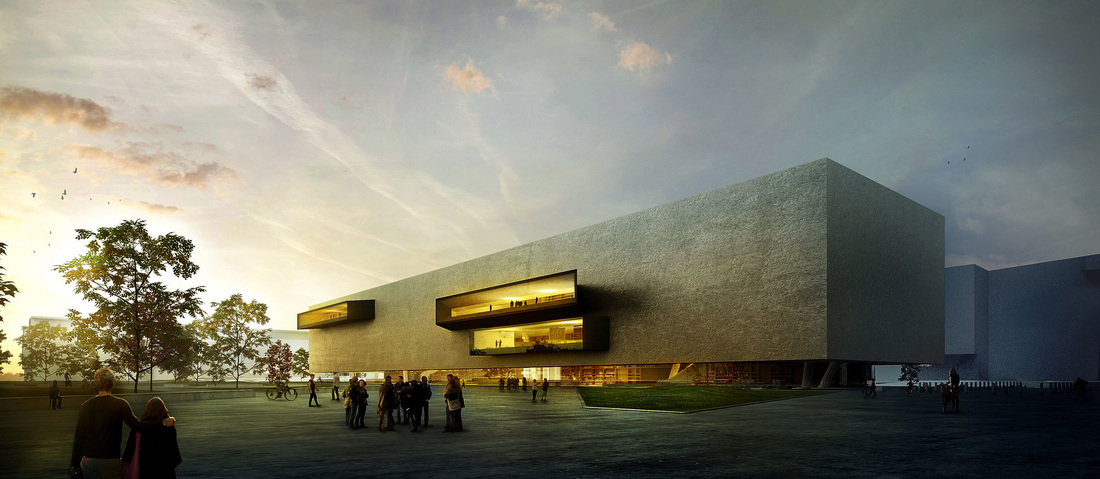
Architectural Visualisation
Architectural visualisation requires a highly skilled artist skilled with 3d design, to create and model architectural buildings, as well as the surroundings they will be placed in. This is common in the occupation of architecture, were 3D artist create designs based on pre-drawn concepts of buildings and architectural landscapes and create a 3d representation and photo real model of them. Common Attribute Required for this Job: The candidate must have a strong knowledge of 3ds Max, V-Ray and Photoshop. Must have an excellent eye for image composition. Advanced skills in lighting, texturing and composition Creating 3D photo realistic renderings of both exterior and interior environments Ability to work on tight deadlines. Ability to work as part of a team. An example of a company that highers a person as an architectural visualization artist would be F10 Studios http://www.f10studios.co.uk/. They specialise in architectural visualisation for different clients, either for new structures or interior designs, this is all part of their field and part of architectural visualisation. |
|
Game Environment Design
Game require 3d environments in order for the character to move through; especially in 360 view. Being an Environment Artists in the Games industry requires you to model 3d backgrounds and 3D elements that will be used in the game, whether for setting the scene or for characters to interact with and use as part if the game play. As an Environment artist are required to create the 3D game environment based on the 3d concept art, in order to to this successfully, the environment artists and the Concept artist must always be constant communication, to ensure the right style and designs meet the criteria. Game companies such as Ubisoft, Sony, Microsoft etc, would require a Game Environment artists to create environments for multiple location within the games, in which the character would transition through. One team works on a game, each person is responsible for one section, so there is constant communication from the concepts to the environments, and the coders as well as involved throughout the process, this is how game companies ensure that the deadlines are met and also that the game is ready for public distribution. As an Environment artist, you are sometimes in teams working on multiple platforms for designing the game environments, using software such as Maya for environment modelling and texturing, then taking it into Unity and Unreal; to code and bring geometry into your game scenes. |
|
Feature Film Environment Design
Feature film is another industry that requires an Environment artists, someone who understands how to model vast scenery and concept based models, which may be complex and high poly. Similar to Game development, as an Environment artists in feature film,you will work closely with the Director, concept artists as well and the lead VFX supervisor in order to reach the final an Idea look. Feature films mainly require photo-real models and in some cases re modelling real life elements to be re composted,for destruction or for CG characters to interact with.
Companies such as D-Neg, MPC, Framestore higher modelers to create assets for scenes, but also environments for feature films. |
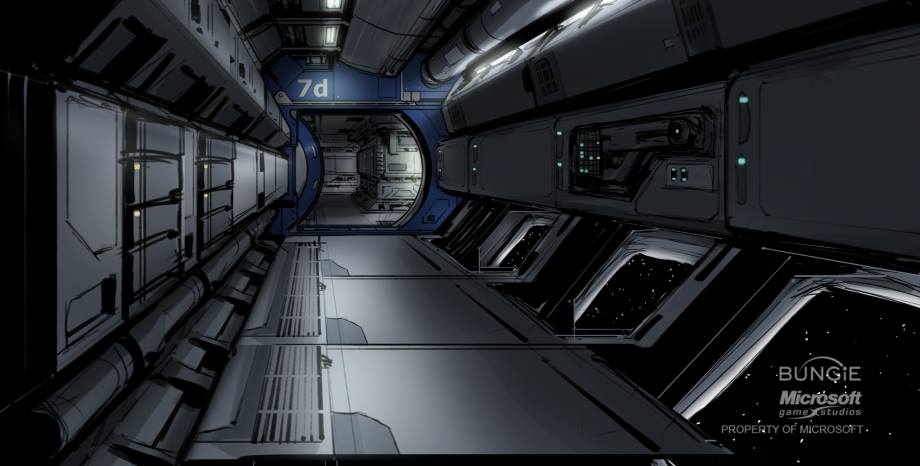
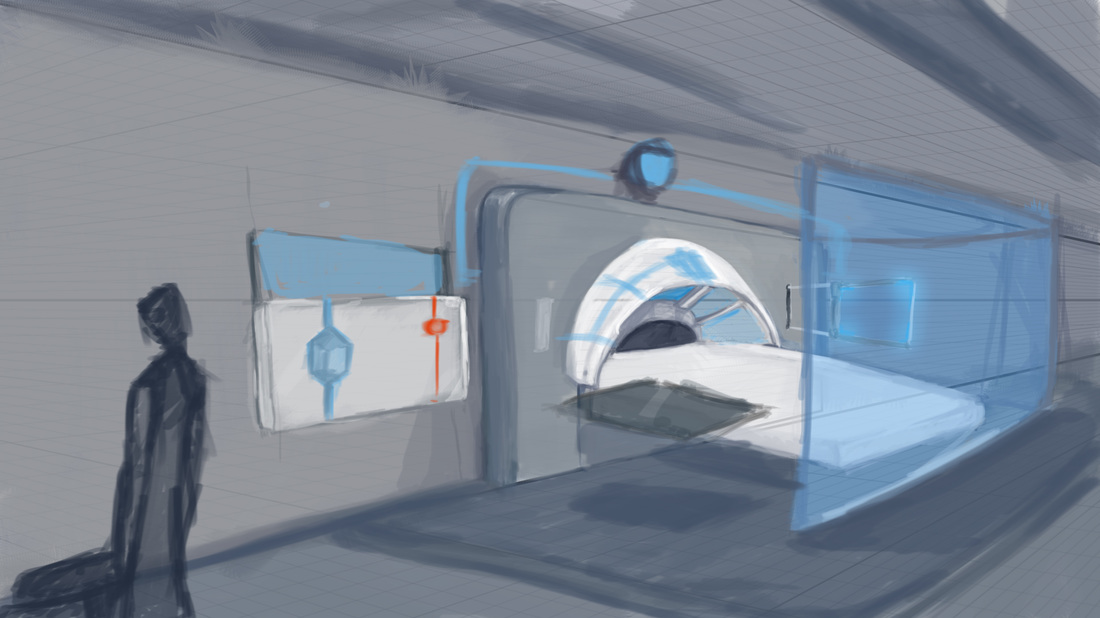
CONCEPTS
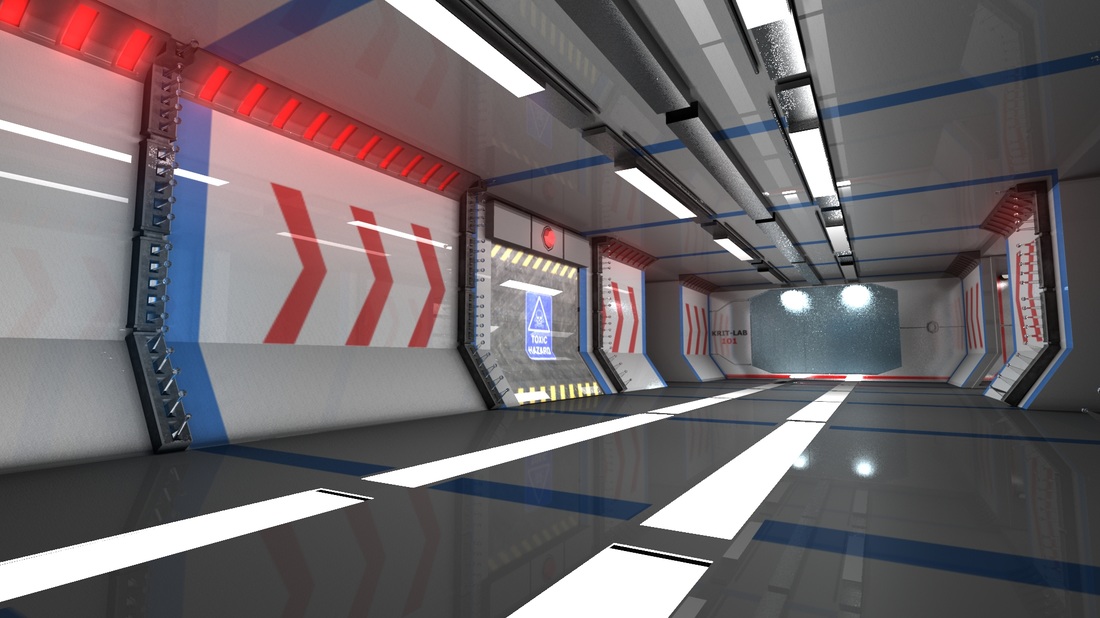
Before concepting was to begin, i broke my scene into the two biggest sections, this was the Corridor and the Main BioLab, these where the key factors in my narrative, in which my camera was going to go through. Through doing research on sci-fi based concepts,i came across these 3 images that i liked and used them as inspiration for my Corridor concepts.

|
|

|
1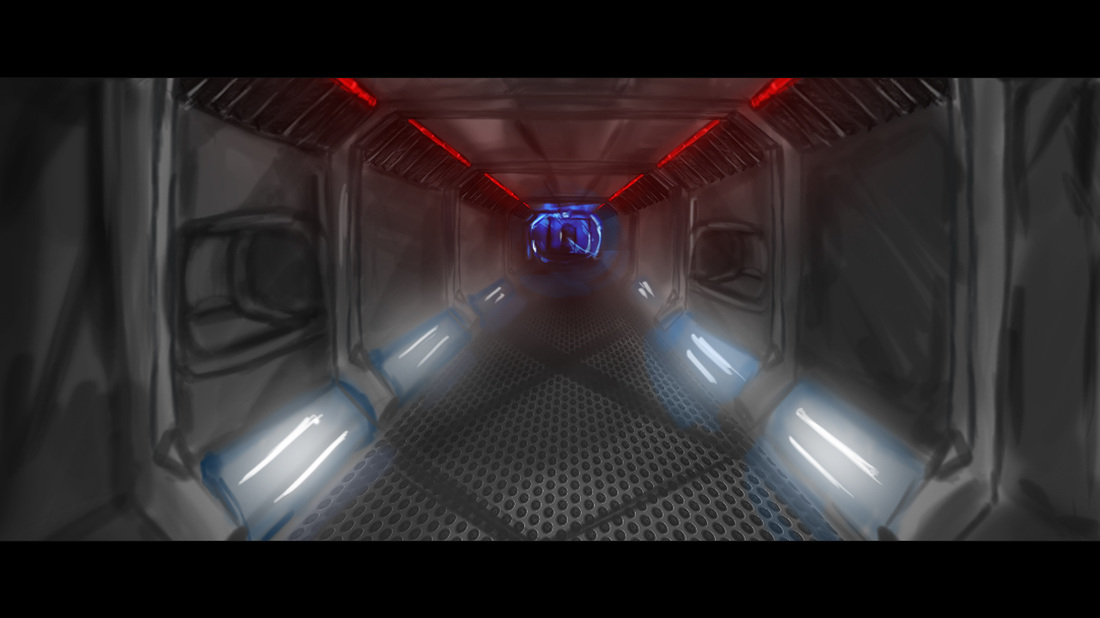
|
2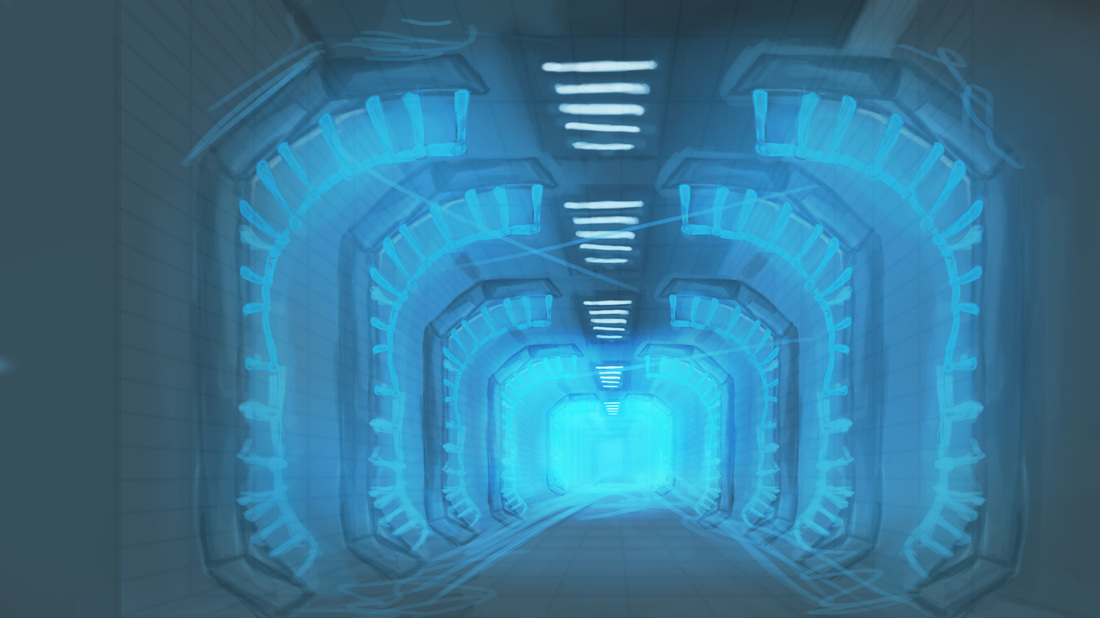
|
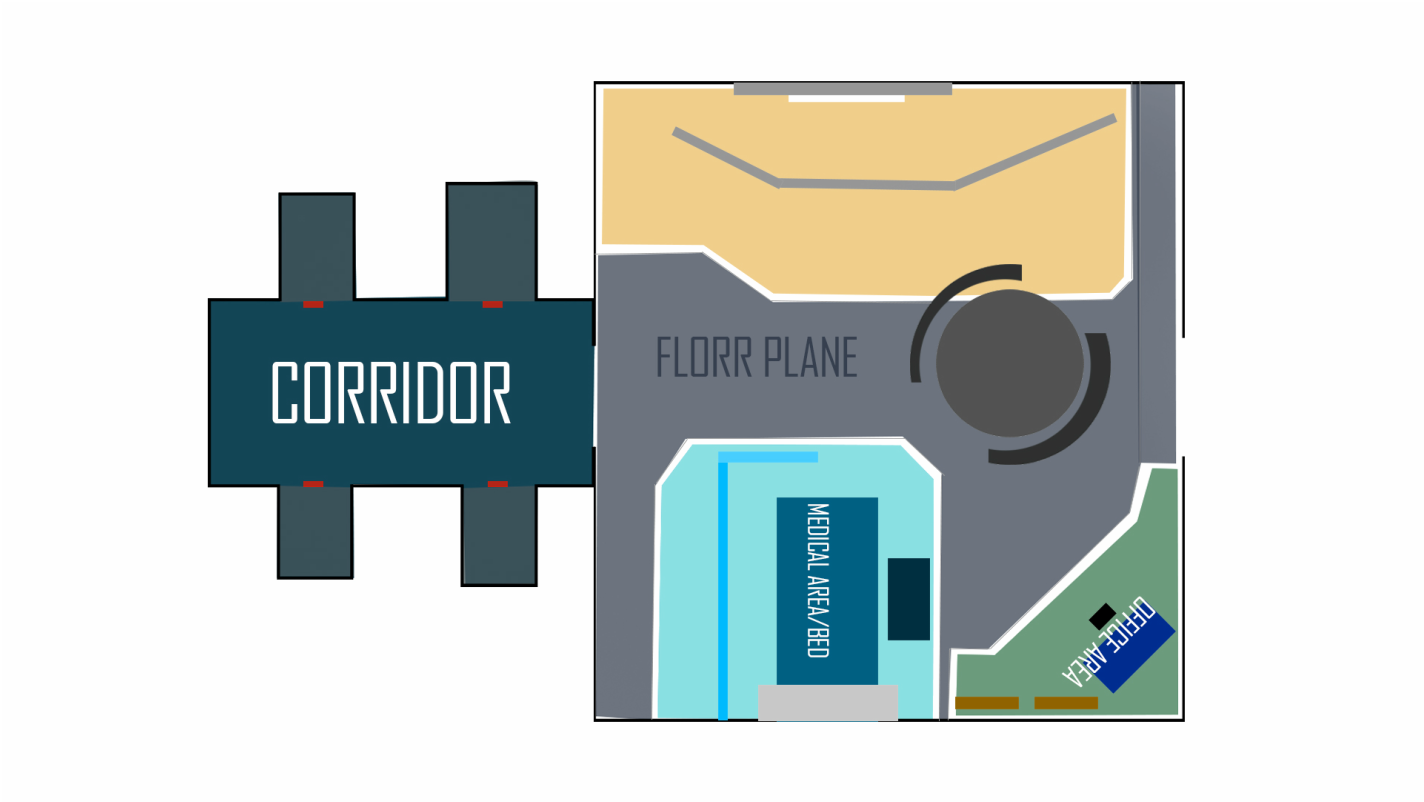
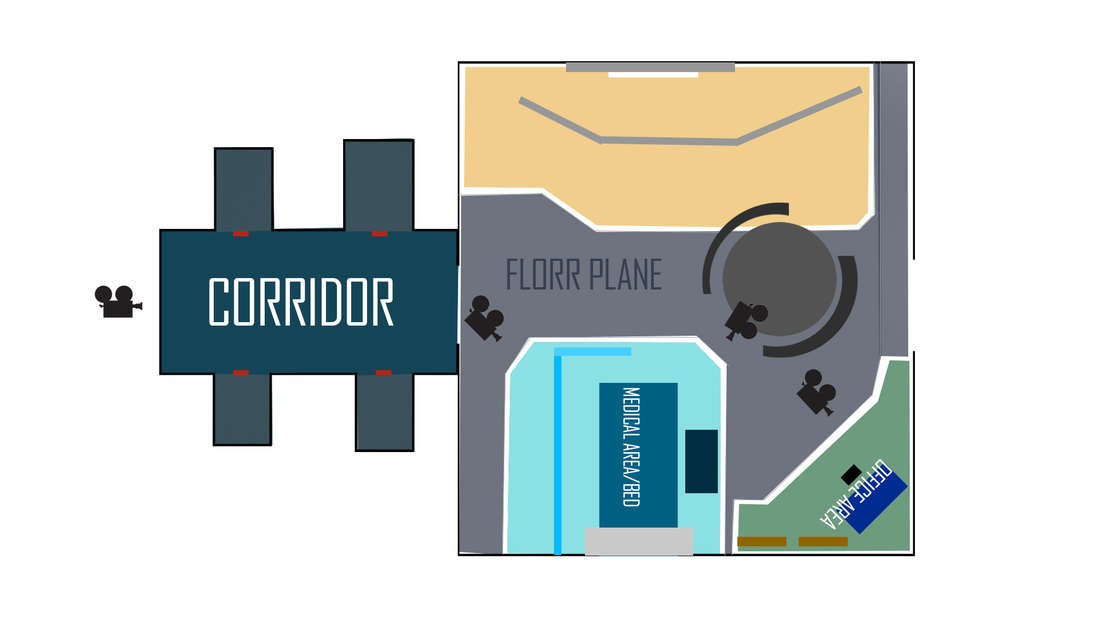
This is a top plane view that i created to represent my scene, it has bee broken down into sections,to allows me to slowly go through both how big my scene would be and how my complex it could become; i did'nt want a scene that was overly cluttered with irrelevant models. Through using this plan view, i was able to model my pre-vis scene.
StoryBoards

|
1. The camera slowly pans into the corridor
2. Slight rotation on the camera, capturing a medium shot of one of the rooms leading from the corridor. 3. As the camera approaches the door, the door automatically opens as the camera fades out. 4. Wide shot of the bio-Lab as we see the full scene. Camera is stationary 5. Cameras pans into the medical bed and moves through the the bed before fading out. 6. Close up of the Organic Preserve 7.Slow pan into the organic preserve 8. Side pan to the side to reveal the CT SCAN 9. |
|
1. Camera pans into the scene
2. SLowly enters the room as the door opens(no cuts 3. Approach on medical area view the textures and glows 4. Over the head glide as the camera leaves the scene 5. Pan across desk, showing who own the Lab (Victor Krit) 6. Slow pan towards the CT Scan as we see footprints on the floor. |
|
This story board was tweaked from the last one, this has been replaced by more dynamic shots, this story board reflect a glide camera moveing through the scene, examining the bio-lab.
|
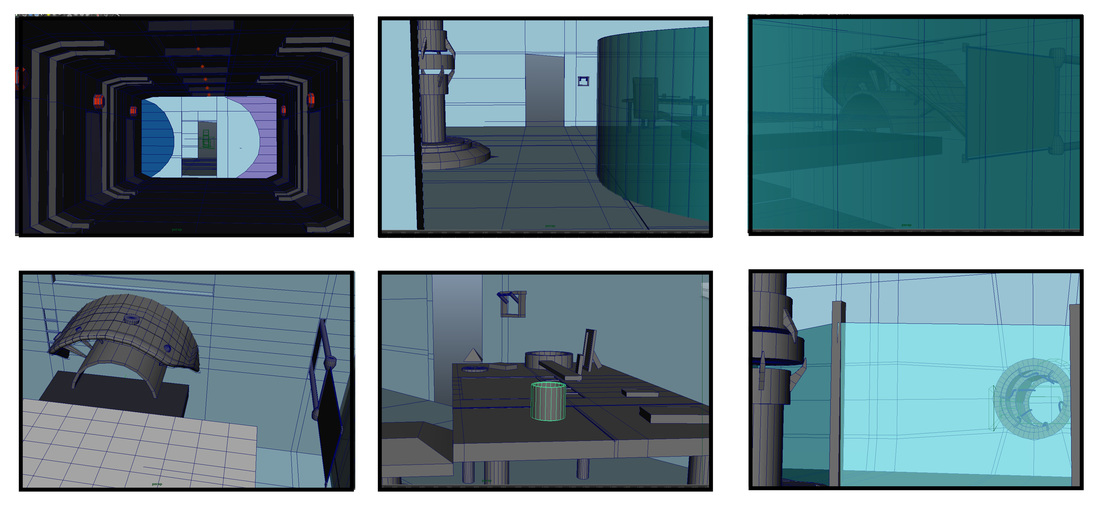
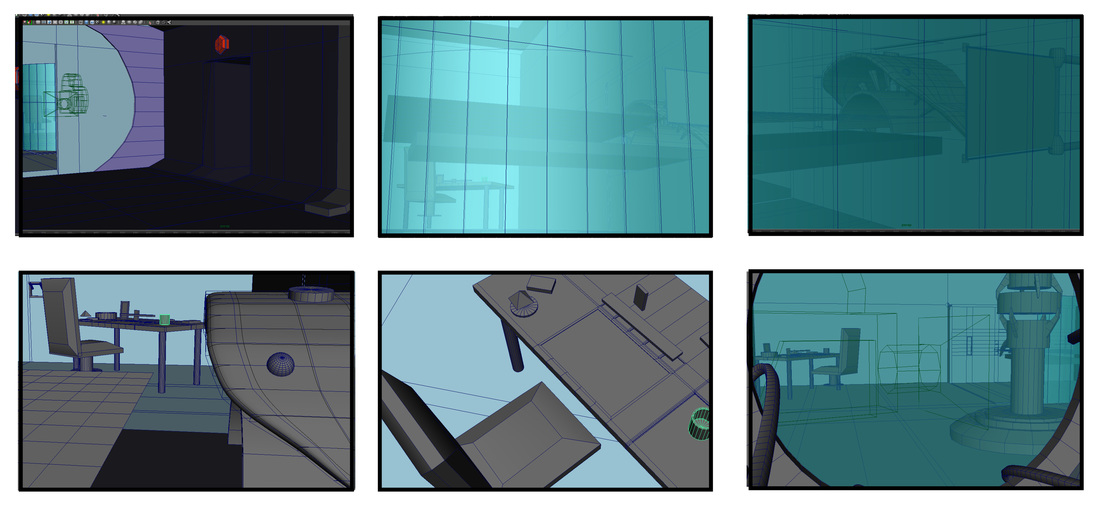
PRE-vIsualisation
Using the Top plan view of my scene, i was also able to apply cameras within my scene, how the cameras would move from the start of the scene to the end. This save more time, as i knew what to focus on when modelling both my scene and pre-vis scene; knowing what the camera would be capturing.
Pre-vis 1- Camera Cuts
This is a cut between cameras as it goes through the scene, showing the intricate details and the texturing, these are clues that tell the narrative and that is going on in the scene.
Pre-vis 2- Glide Cam (1cut)
CONCLUSION
Based on the two camera styles,i felt the the glide cam worked more effectively in how i want the narrative to be told. It give the impression of a drone scanning the scene and analyzing what has gone wrong. However the first pre-vis doesn't give a clear idea of a story but just a scenery display and the showing of modeled assets. My opinion may change later on depending on how my final scene looks but based on my Pre-vis, i will be using the glide cam as my camera style.
modelling
BiO-lAB
MAIN CONCEPT- MODEL INSPIRATION
Lambert Texture with Sun and Sky Light
|
UV texture
|
UV Mapped Texture with Directional Lighting
|
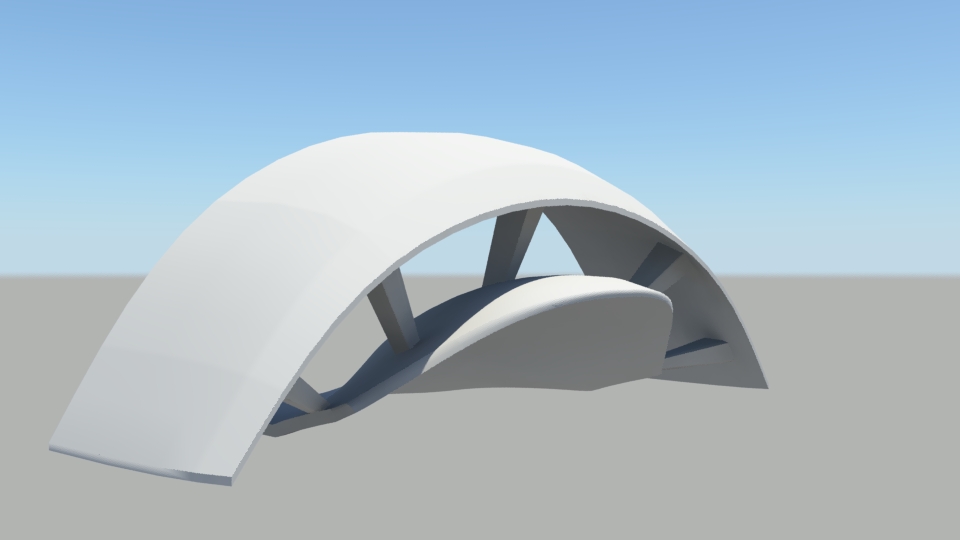
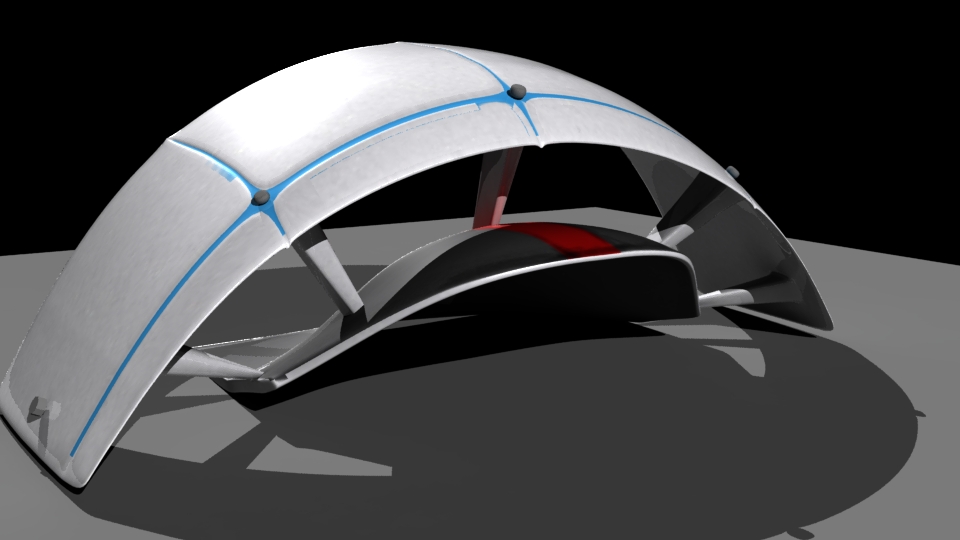
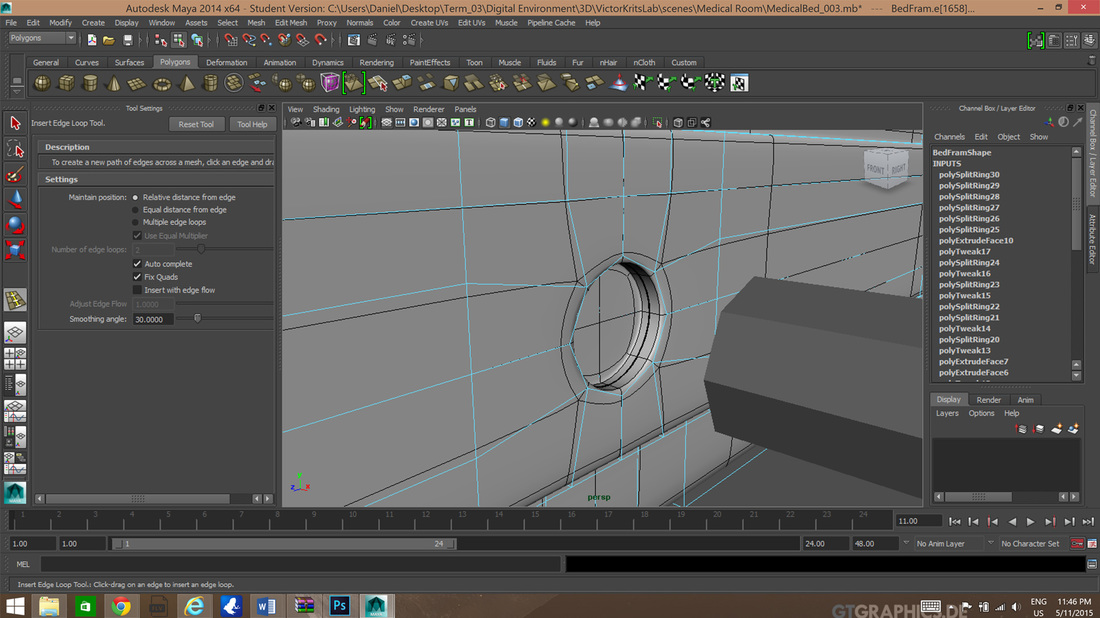
To create this model, i used surfaces and splices to create the curvature the shape to fit the concept art. The surfaces was then converted into a polygon to that i could add extrusions and further manipulate the designs. I then began to build up the scene with the different assets that make my medical bed.

|
|
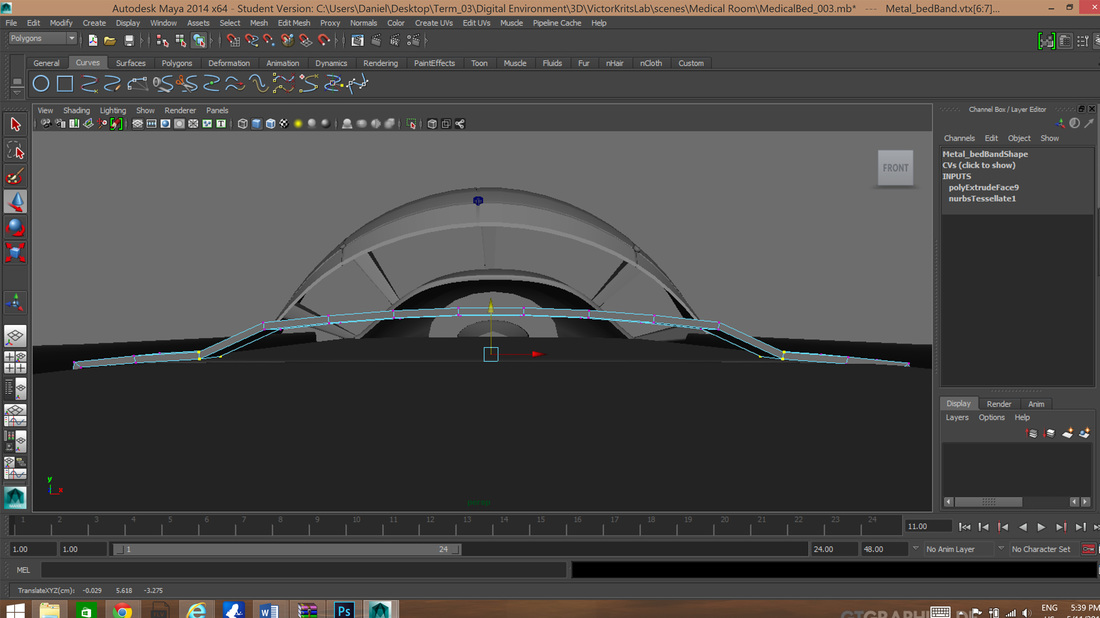
Modelling of Bed metal frames
|

Linking Maya plastic texture to lambert glow effect-Result
|
|
Bed Platform UV
|
|
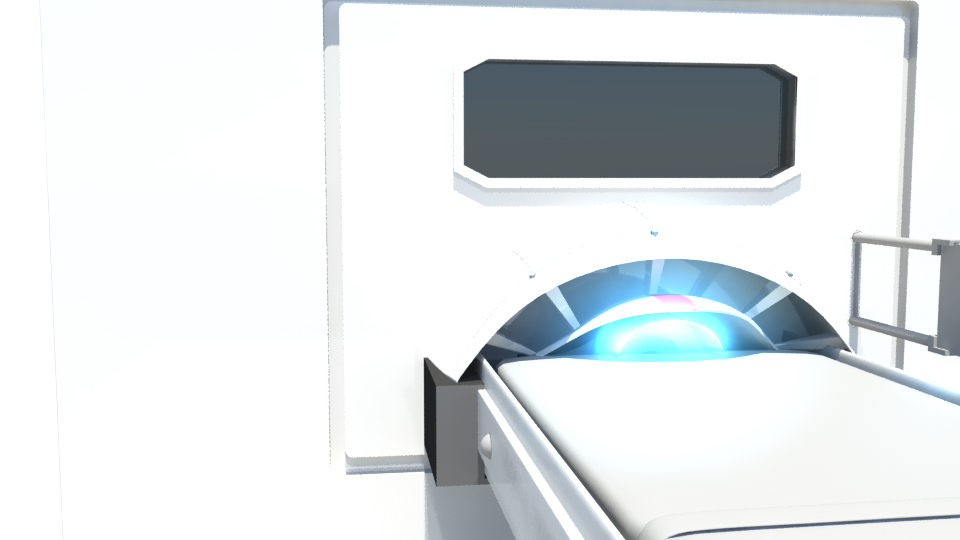
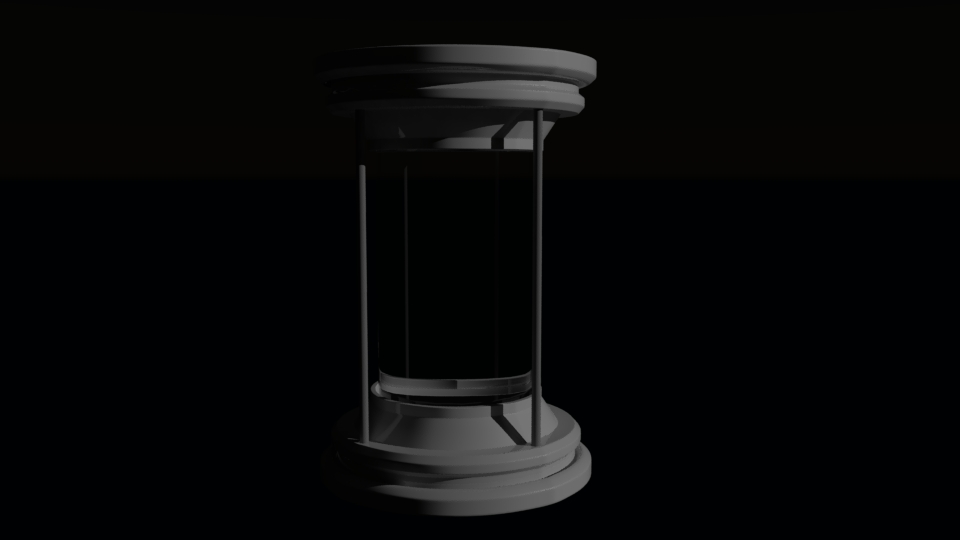
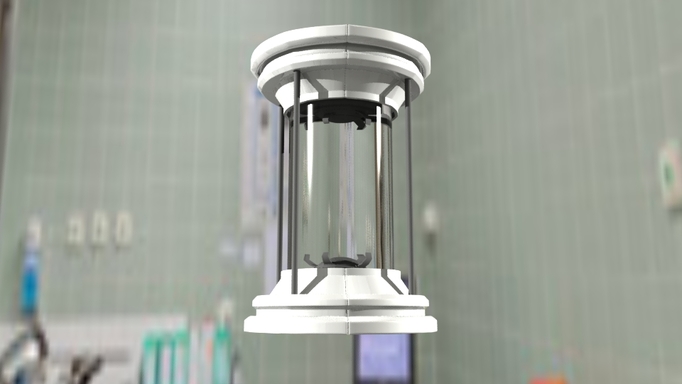
organic Preserve- model
Metal ray Glossy plastic material pass
Mental ray Glass thin preset 1 directional light |
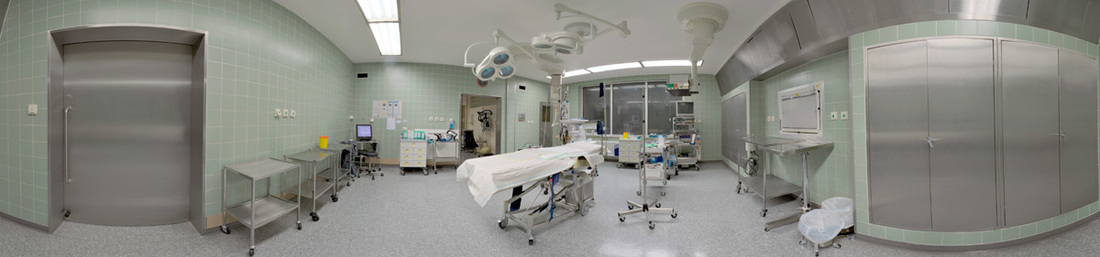
IBL(Image Based Lighting) Image of a hispital scene, from google.com
|
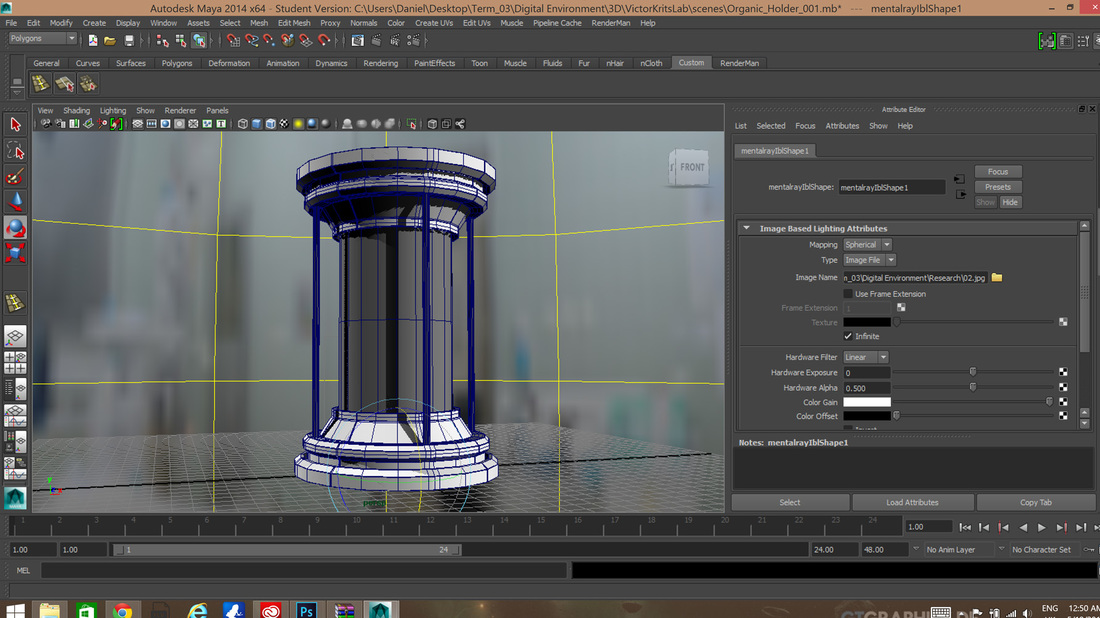
In order to get a realistic look from the glass, and IBL was applied to the scene, which gave the glass something to refract, giving a more real look.
|
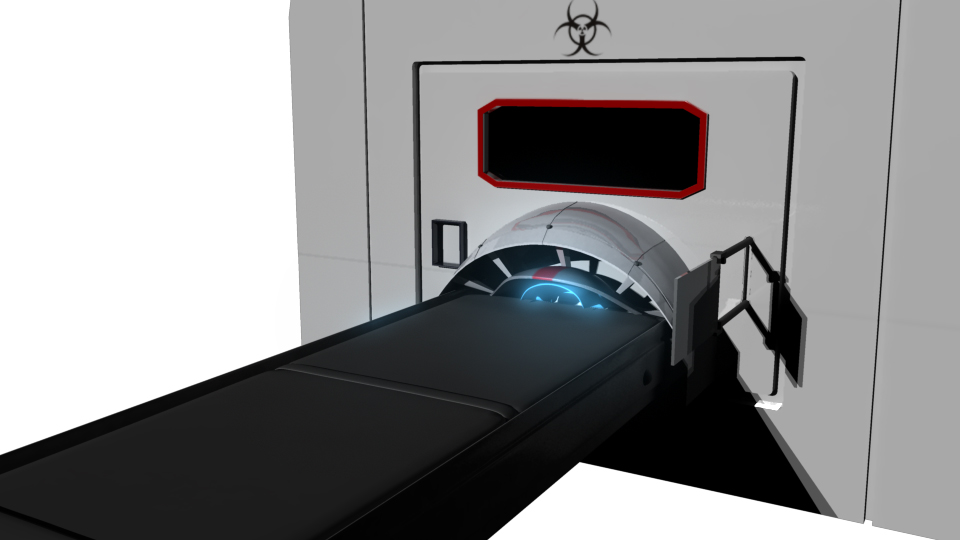
FINAL OUTCOME
main scene
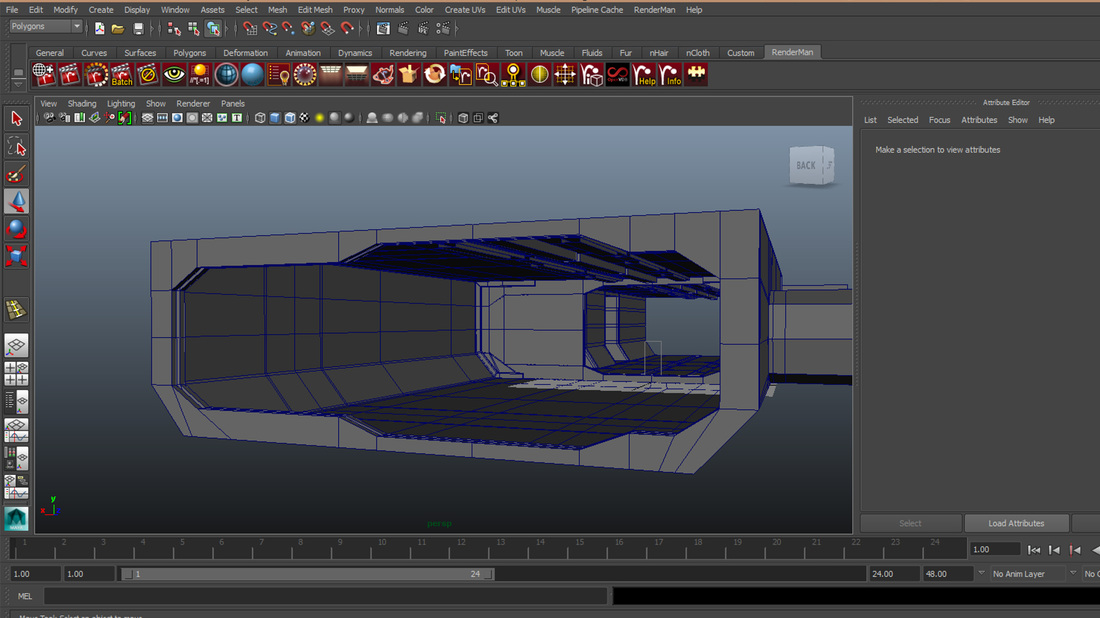
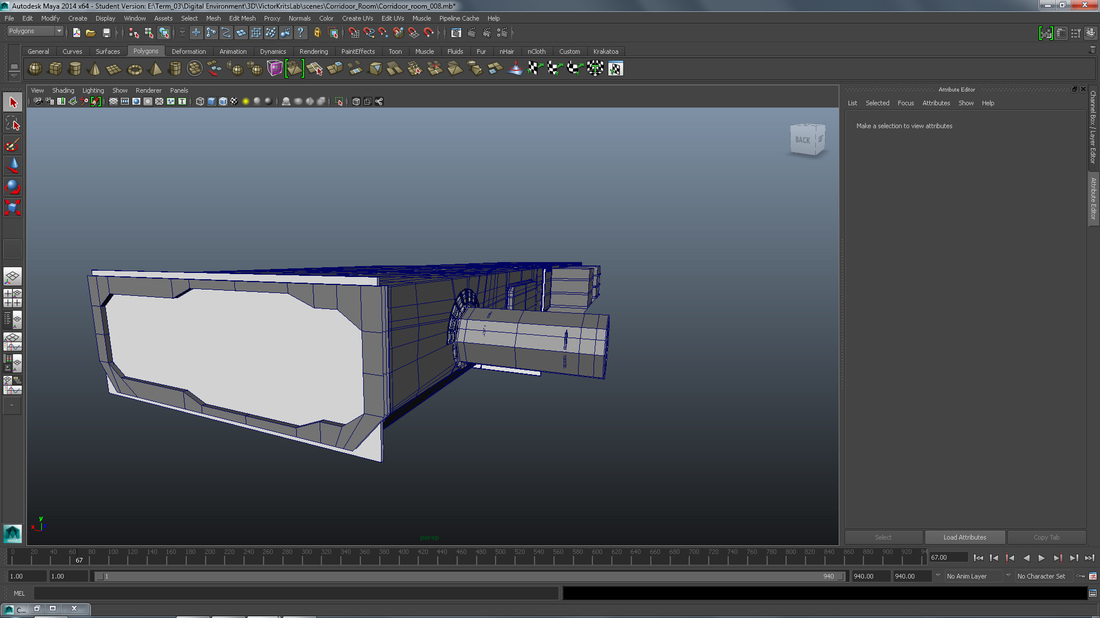
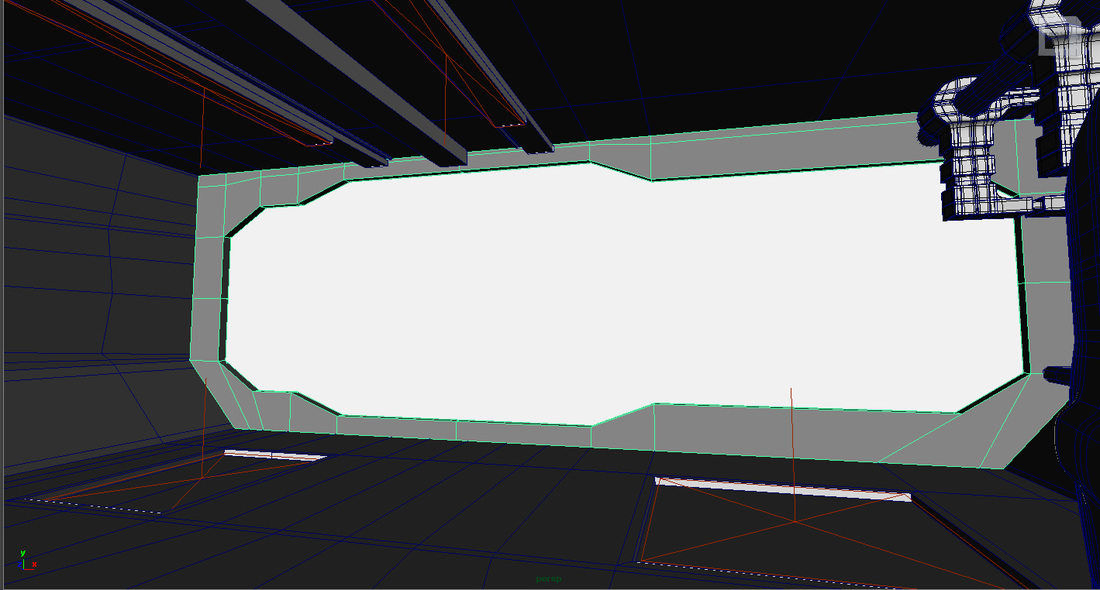
This was the main sections of the project, creating the scenes framing, where all the assets come together to for the bio Lab, luckily i came across a tutorial on Digital tutors that fit my ideas on how my scene should look like. Using this as inspiration to modelling the door and the framing of my scene to real life proportions, this is so when i import my assets they will be sized relativity to the scene. Using this tutorial i modeled the door frame, the light panels on the top and the rooms shell.
|
|
|
Through using the tutorial to get a basic shape for both my Bio Lab and the corridor to real life proportion, manipulating and changing certain aspects of the geometry as i went; so that it would be based on my conceptual designs and inspiration research. The main shell for both the corridor and the medical room was extruded from the edges of the door frame, making fit the same shape as the door.
Sub-divisions where then added to create the external rooms extruded in the corridor. |
MERGING sCENES
|
|
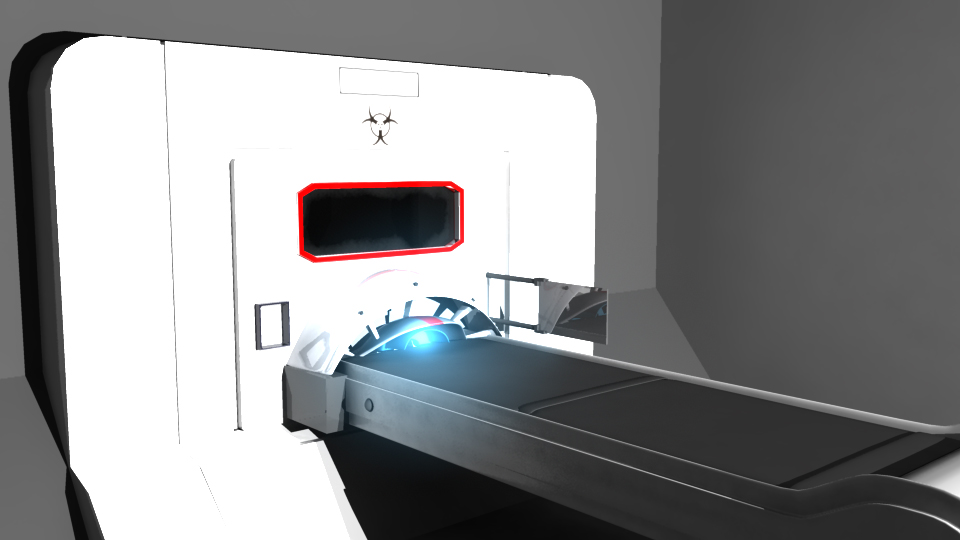
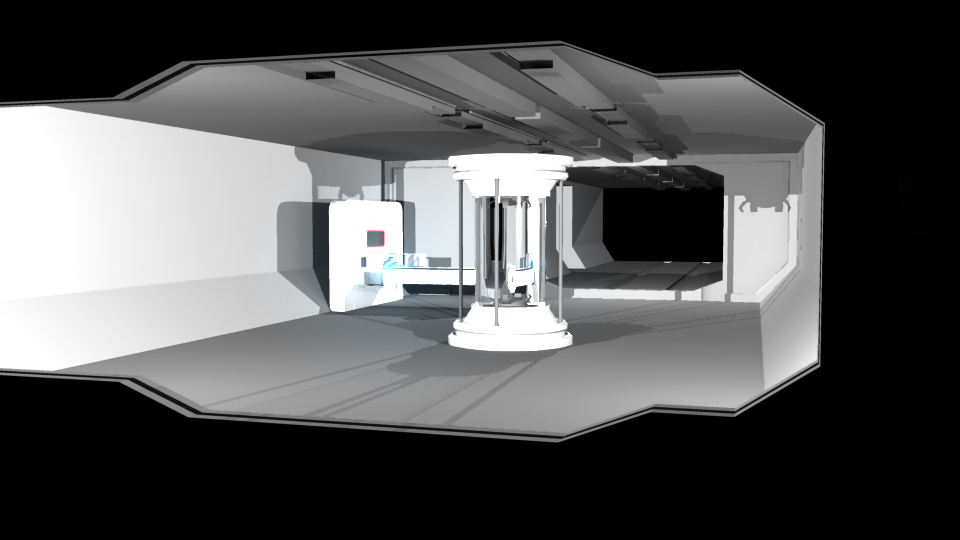
BY modeling my scene to scale, when importing my elements into the scene, they fit perfectly as seen in the image above. This was rendered with a sun and sky lighting, as you can see the colors are washed out, however this was not a lighting test but was used to see the assets.
Assets creation
The assets are what really create and build the scene, giving it a scene of realism as well as detail, i began to model key assets in my scenes and textured them. I will not be going through every small assets in which i modeled, but the key models that required UV mapping and texturing for a realistic look. Textures were linked into mental ray presets, such as, plastic and glass, this allowed the textures and the material to interact with the lighting. The images below show both the UV maps created using Photoshop, UV layout and also the models they were applied to. By using UV Layout during lectures, we were shown how to cut a piece of geometry into shapes that were flat and in wire frame, this allowed us to control how the uv map was broken down and where each peice was represented on the geometry. We then took the geometry back into Maya and set the Layout for the uv mapping, this condensed the UV's into the UV space; the next ste was Photoshop.
Photoshop was a very useful tool that allowed me to create and personalise my own textures, using some basic images found on google, i was able to take some of these textures and ass could and glows to fit my preference. The images below show some of the different assets i modeled as well as the UV mapped textures both customised in Photoshop and applied to different material passes, such as Mental ray Glossy plastic passes or glass and metal passes in Maya. HERE ARE THE RESULTS.
Photoshop was a very useful tool that allowed me to create and personalise my own textures, using some basic images found on google, i was able to take some of these textures and ass could and glows to fit my preference. The images below show some of the different assets i modeled as well as the UV mapped textures both customised in Photoshop and applied to different material passes, such as Mental ray Glossy plastic passes or glass and metal passes in Maya. HERE ARE THE RESULTS.
|
PIPE HOLDERS
|
DESK SCREEN
|
Cieling Pipes
|
|
VICTOR KRITS DESK CHAIR
|
HUD BED SCREEN DISPLAY
|
CORRIDOR PANELS
|
|
EXPERIMENT BOOK
|
DOOR FRAME
|
MAIN SCREEN
|
|
|
|
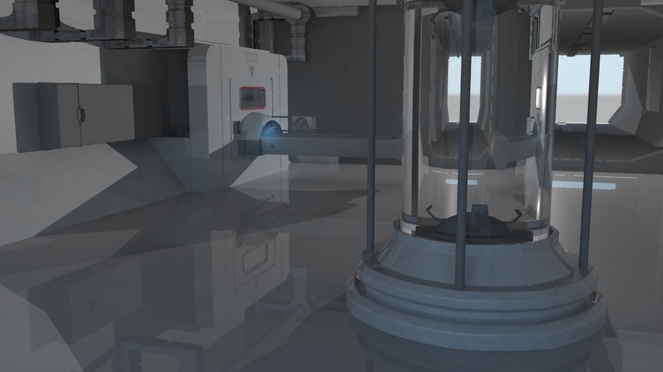
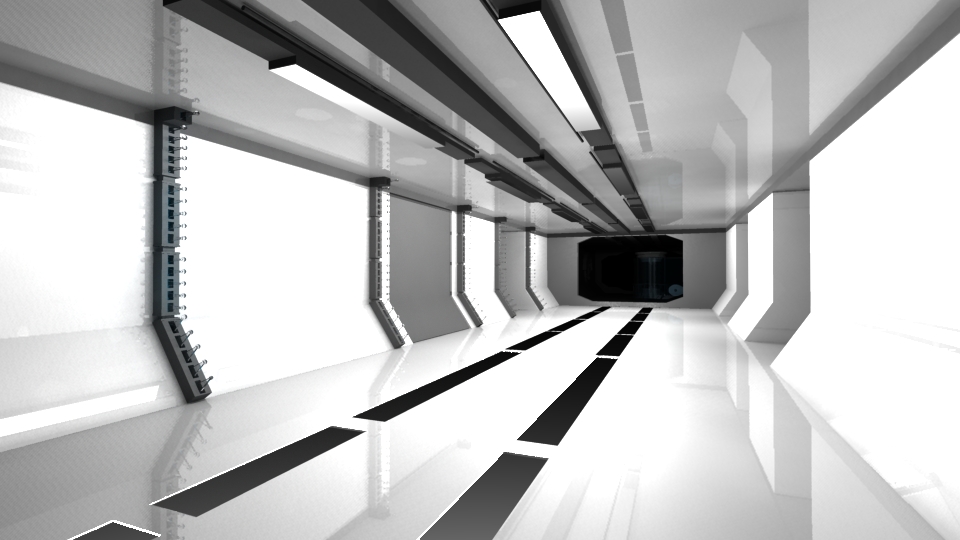
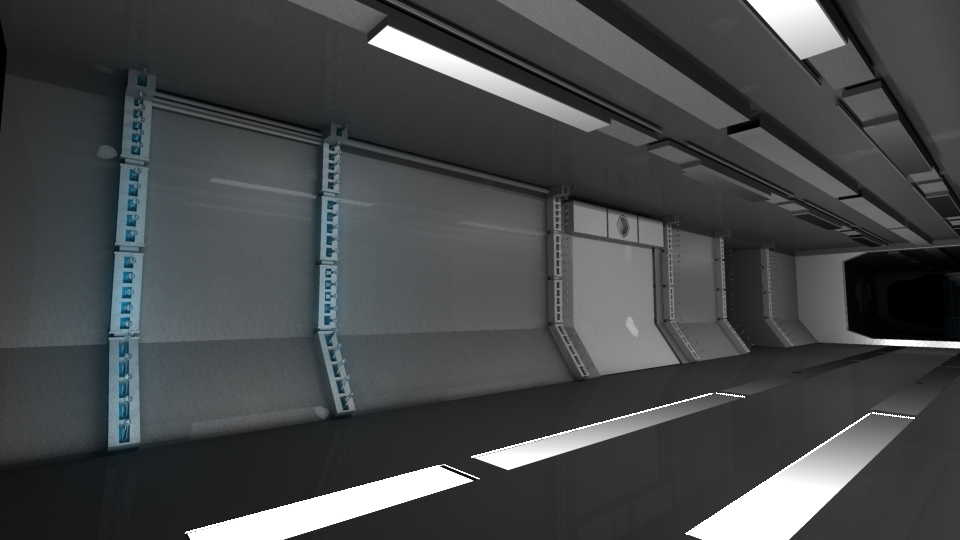
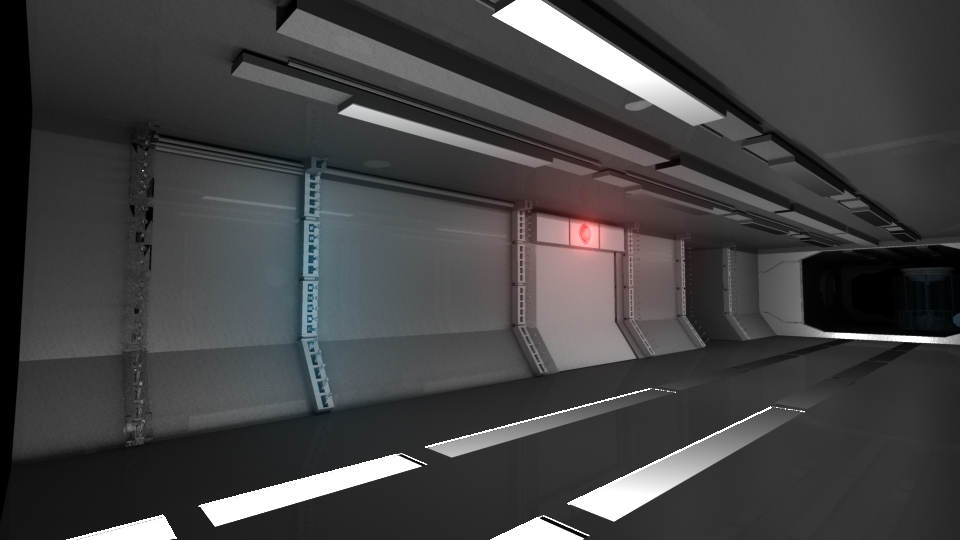
lighting renders
These are some of the lighting stages in which i took to get to my final renders. Using area lights i was able to tweak the settings and adjust the brightness to give a nice look to my scene. Setting the Decay to 'Quadratic' meant that the lighting changed relatively to how far the camera was to the light, these were the following processes.
Main Lights used : AREA LIGHTS
Main Lights used : AREA LIGHTS
|
|
|
|

|
|
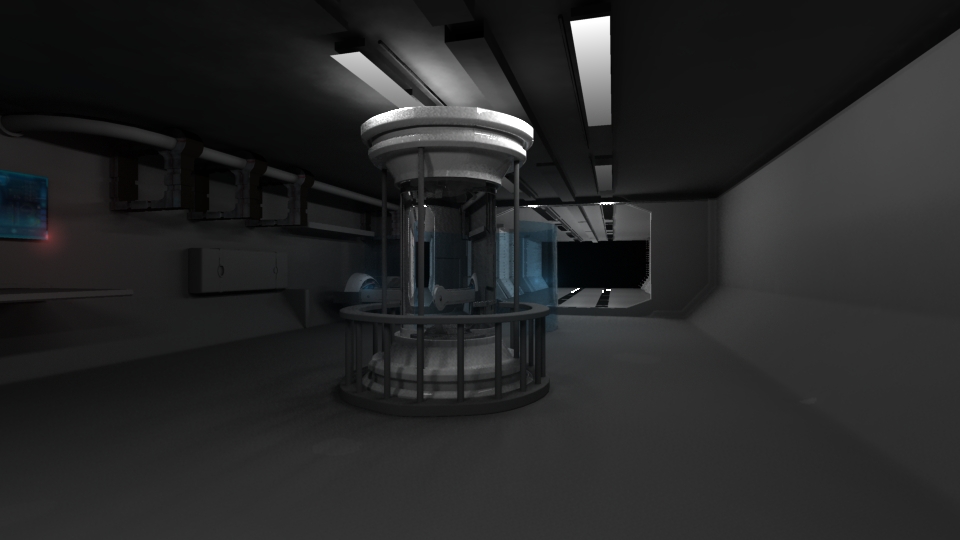
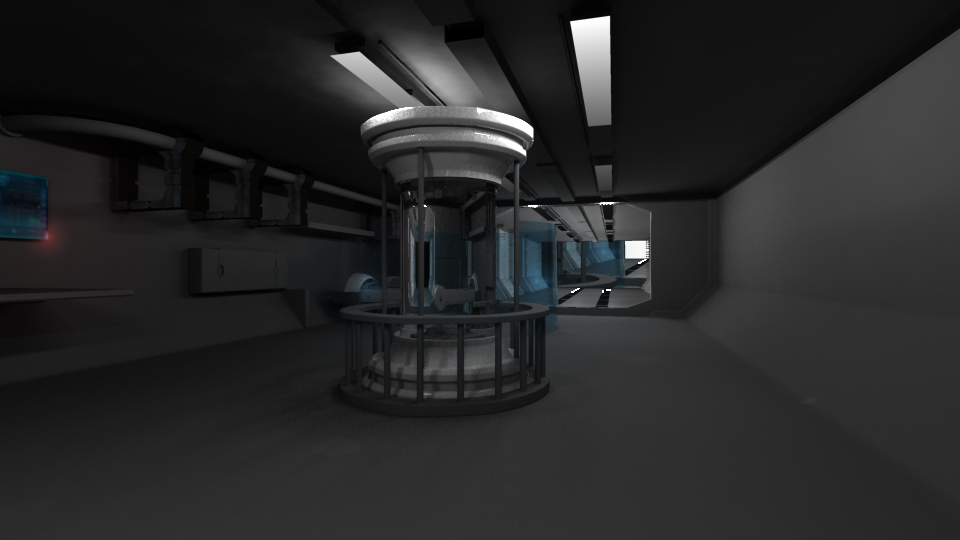
FINAL SCENE PLAYBLAST
Final Shots- Stills

Final rendered shots
Conclusion
Does it look Good?
Overall i am very proud at my work, although the render could have been rendered in 1080p HD, which would have reflected the quality of the texturing and how the lighting compliments the scene. Visually you can see from the stills the details of the models and how I was able to turn primitive shapes into high poly and more complete shapes. I was pleased with the overall lighting. Using area lights to slowly build up the scene and by tweaking the setting i was able to get some nice stills; with added final gather and global illumination. The overall look i intended was shown and i believe that my technique of implementing the textures with Maya passes and Lambert glow effects worked well for the bed platform and the CT scanner.
Where did i go right& Wrong?
I feel that in terms of modelling i was very confident in creating designs from a concept, getting an accurate representation of the look, feel and design. Using the UV Layout, i think i did well in cutting up complex geometry and taking it into Photoshop to create textures. I found that creating unique texture to fit a desired look was quite difficult as i to blend textures together and add different layers. Modelling my assets i felt i did confidently, without the use of tutorials i broke down complex models such as the bed, the CT scanner and the chair into basic models for me model and got through the details in the scene.
Area of Improvement?
For areas of improvement i would work mainly on my texturing and lighting, focusing on how to truly achieve a photo real looks and how the lighting and texturing effects your render. If i had know how long per frame my render would have taken, i would have been able to tweak down the render settings and adjust it to allow a fast render. For the next time i will try to get more details out of my models, more high poly modelling, although this may take longer to render, i really want to push my limits in getting a precise model. As i want to go into visual effects more, i want to learn more on composting and matte paint as this is the area i want to go into, integrating both CG and live footage or elements to create a unique piece of work. I feel that my skills are more confident in Maya, Nuke and UV layout and that i can take on client projects and use this as part of my portfolio. As an area of improvement, i am going to work on this project over the summer to achieve a photo real finish and add it to my portfolio, this will give me more time to advance my skills in both lighting and texturing and Maya as a whole. As a final comment i really enjoyed this unit and has inspired me to create concept of my own.
